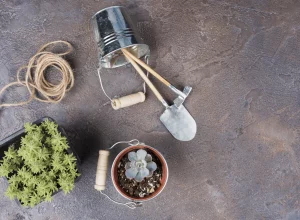
 Whether you are a professional gardener or just someone with a green thumb, you know how important it is to keep your tools in a good condition and clean. Regularly cleaning your gardening tools will ensure that your garden receives the proper care it deserves. Each tool is important for your success as a gardener and the life of all plants living under your wing.
Cleaning of gardening tools will help prevent rust and mould from forming, will keep your edges sharp, and remove sap and soil. Another very important reason for regularly cleaning your tools is the cross-contamination that can occur whenever you are working with diseased or pest-infested plants. You will ensure no fungus, aphids, or other problems will transfer to the plants you are treating with the same tools.
While you should clean (remove loose soil and rinse) your gardening tools after every use, their thorough cleaning is required after the end of the season. Always inspect and clean your tools before storing them for the winter.
Before working around a healthy plant, tools that have been used to prune or remove a diseased plant should be thoroughly cleaned. To clean the tools, dip them in a bucket of one part chlorine bleach to nine parts water. Dry them thoroughly, then use them to work on the next plant.
Here is how to tackle the cleaning of your gardening tools in a few simple steps:
- Remove loose soil and dirt – Scrape away any stuck-on soil or mud from your tools. Then use the blast from your water hose to rinse the rest. You can use a stiff brush to help get rid of stubborn grime.
- Soak the tools – To get rid of muddy residue, fill a bucket with hot water and add about ½ teaspoon of dishwashing liquid. Mix well. Once you remove the heavy soil from your tools, place them in the bucket. Make sure they are fully submerged. Allow all tools to soak in the solution for 15-20 minutes.
- Rinse – Once you are done with the soaking, remove all tools and rinse them with cold water. Carefully dry them with a microfiber towel. Allow them to completely air dry to prevent rust from forming.
- Inspect the tools for rust – If you have stored your tools damp or in a moist place, rust may form on them. Check each tool for any rusty marks. Use a sharp wire brush or steel wool to scrub away rust areas if rust or pitting is present. Apply a thin layer of vegetable oil to the instrument to help the rust come off as you scrub.
- Clean sticky tools – Tools may have insect or plant sap residue if they feel sticky. Pour some turpentine or lighter fluid on an old rag. Pay particular attention to the hinged areas when you clean the instrument.
- Disinfect all tools – Tools should be cleaned and disinfected before being stored to get rid of germs and fungus that could be harmful. Two cups of chlorine bleach and 4 litres of water should be combined to create the solution. The tools should be submerged and left to soak for 10 minutes. Rinse well, then pat dry with an old cloth.
Additional tips on maintaining your gardening tools in top condition.
If you want to keep your tools working great and in good condition, you should regularly clean them. That way you will ensure having them for many years:
- Even if you know you’ll be using the shovel, trowel, or shears the following day, don’t leave them in the garden overnight. After cleaning, put them back in storage to keep them dry and, ideally, rust-free.
- The wooden handles on your tools will eventually start to dry out, crack, and come away from the metal part. Once or twice a year, smooth up any rough edges on the handles with medium-grit sandpaper before applying linseed oil. Water is repelled by the protective barrier that the oil adds.
- Any gardening equipment with an edge, such as shovels, snips, and pruners, may occasionally need to be sharpened. A flat mill file can be used to sharpen large blades and edges, and a whetstone can be used to sharpen smaller, finer edges.
Fill a big flower pot or bucket with sand and add a cup of vegetable oil to keep small trowels and hand tools from rusting and keeping them lubed. Mix well, and then press the tool’s metal ends into the greased sand. To avoid the handles of larger tools from warping and to keep metal parts off the floor and dry, hang them from hooks or a pegboard if possible.
The metal component of most wooden handles can be removed, then a new handle can be installed.
Start by using WD-40 to clean the blades. Following the initial bevel, file the edges at an angle between 20 and 45 degrees. Then, wipe down with a soft towel to get rid of any remaining metal shavings.
