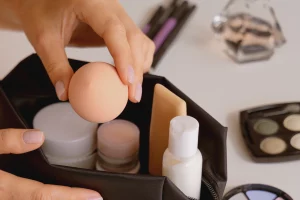
When new, beautyblenders look like the perfect, clean, neon egg. However, it only takes one use to make them far from that. With the first makeup application, they absorb a bunch of foundation, powder and other makeup that makes them look far from clean and pleasant.
An important detail to keep in mind is that after all, beautyblenders are simply sponges. And as we all know, sponges absorb well and are prone to bacteria growth. Not only the fact that they stay wet causes mould and mildew growth. The fact that they touch your face increases the amount of bacteria that gets trapped inside. That makes it very important that you keep your makeup sponges clean and dry.
If you have acne prone or sensitive skin, you should clean your beautyblender daily. WIth every use, they collect dead skin cells, oil, moisture, pollution and bacteria.
Experta have stated that it is best to clean your beautyblender right before use in the morning. That way, not only will it be clean and safe but you will also wet it, getting it ready to use. Regularly cleaning your brushes and sponges will help prevent bacteria growth.
Here is how you can safely clean your beautyblender.
How to properly clean a beautyblender with a solid
Professionals say it is best to use gentle bar soap, dish soap or makeup sponge cleaning solids. You can find commercial beautyblender cleanser in liquid form as well. By using it, you will be able to remove dirt and stains without damaging your beauty tool.
Pick a cleanser with mostly natural ingredients. Even if stains are left behind, they will ensure that your beautyblender is bacteria free. Use a cleaning solid for more thorough cleaning. Here is how to use:
<olL
How to clean beautyblenders with dish soap
Using a gentle dish soap will not damage your makeup sponge but it will thoroughly clean it since it is a degreaser. It will break down all the foundation and concealer that might be trapped in it. Here is how to use a gentle dish soap and clean your sponge with it:
- Dab a small amount directly onto the sponge. Squeeze and massage the blender for about 1 minute.
- Keep working the detergent into the sponge with your fingers for a few minutes.
- Squeeze it again and rinse thoroughly until no more soap is coming out and water runs clear. Gently roll it in a towel and lay flat to dry completely.
Beatyblenders and microwaves
You have probably seen the trend of microwaving your bleautyblender. That became viral on the internet and so many people did it. It makes cleaning your makeup sponge incredibly easy. However, it has its downsides. People shared stories about setting their beautyblenders on fire or simply the hack not really working. If you decide to try this out, make sure you don’t let your sponge out of sight.
When to replace your beautyblender?
Sometimes, cleaning is just not enough. If you have had your beautyblender for a while or you cannot manage to properly clean it, maybe it is time to consider buying a new one. Experts say it is recommended to change your makeup sponge every 3 months so try not to use one for much longer. Here are some signs you can look out for:
- Stubborn stains that do not seem to wash out
- Tears or rips (they will collect even more bacteria which will be harder to get rid of)
- Your sponge feels soft and squishy, instead of plump and bouncy
In general, make sure you take care of all your makeup tools, including sponges, brushes, spoolies and others. Make sure they are regularly cleaned and avoid using old or spoiled makeup. If your skin is prone to breakouts, rashes or irritations, consider cleaning your tools more often. Take care of sponges daily and create a regular cleaning routine for all your tools (depending on how often you use them). Once a week is enough to keep bacteria at bay.
You can buy two beautyblenders so that you can use one, while the other is being cleaned and drying. We also suggest you have a few sets of brushes in order to avoid buildup of dead skin cells, oil and bacteria.
Always use gentle cleansers whether or not they are specifically made for makeup tools. That way, you will ensure that your tools are not damaged, but also that you avoid irritation to your skin, eyes or face in general.
